WebFolders
About
This feature allows you to store, transfer and backup files stored in remote servers over the Internet connection, directly from your desktop as a mapped network drive. It is recommended for corporate environments due to its firewall friendliness and full SSL support.
Setup in Windows XP
To connect to your server using Windows XP, do the following:
- In the Start menu, click the My Network Places item.
The My Network Places dialog appears.
- In the Network Tasks panel, click the Add a network place link.
The Add Network Place Wizard appears.
- On the Welcome page, click Next.
- On the next page, click the Choose another network location. Specify the address of a Web Site, network location, or FTP site item to highlight it, click Next.
- Fill in the Internet or network address field. The right address format is: http://<server>/webdav/<email_address>.
E.g.: http://mail.icewarpdemo.com/webdav/john.doe@icewarpdemo.com
Click Next.
- Fill in the Type a name for this network place field. Click Next.
- Click Finish.
Setup in Windows 7
To connect to your server using Windows 7, do the following:
- In the Computer directory, click the Map network drive button.
- In the Map Network Drive dialog, select a drive and enter URL to the Folder field.
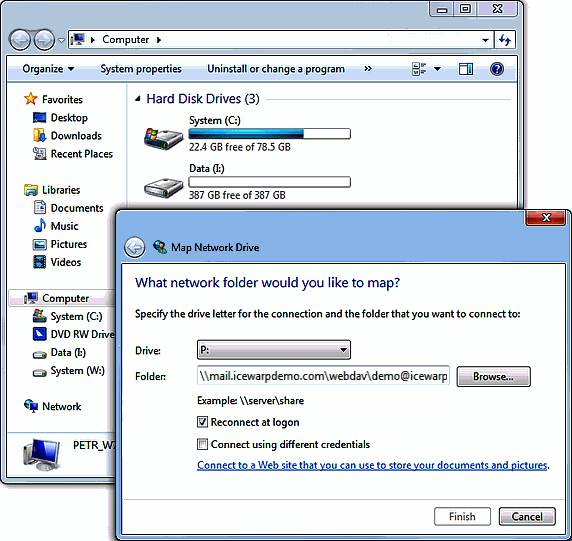
Figure. Selecting drive.
-
Click Finish. The Connect to... dialog appears.
-
Fill in your email address into the User name field and password into the appropriate field. Click OK. A new window with this network drive appears.
Setup in Mac OS X (Finder)
To connect to your server in Finder, do the following:
- From the Finder application menu, select Go Connect to Server (or press Command+K).
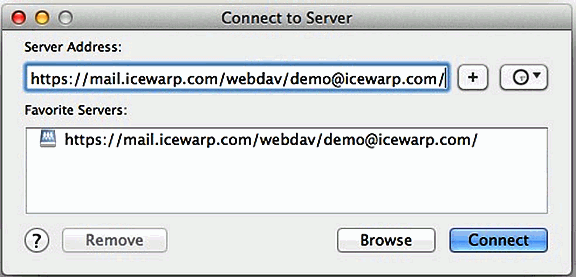
Figure. Connecting to server.
- In the Connect to Server dialog, enter URL to the Server Address field. Optionally, click + (plus) button to add it to your Favorite Servers. Click Connect. The Connect as... dialog appears.
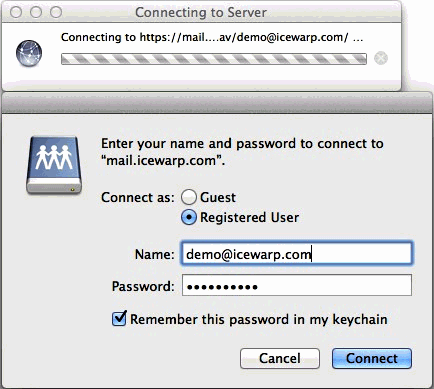
Figure. Connect as dialog.
- Fill in your email address into the Name field and password into the appropriate field. You can Check Remember this password in my keychain if you wish to save these credentials. Click Connect. A new window with this network volume appears.
- You can drag the volume (labeled with your email address) to the Finder side bar to save it as a shortcut in Favorites.
- To show the drive on your desktop, enable Finder Preferences Show these items on the desktop Check Connected servers. Or drag the volume to the desktop to create an alias.
- To browse your Files, you need to select the Files folder from the drive folders. This is a limitation of the Finder. You can drag the Files folder as an alias to your desktop or Finder side bar favorites.
Setup in Cyberduck
To connect to your server using Cyberduck (Open source FTP, SFTP, WebDAV, Cloud Files, Google Docs & Amazon S3 Browser for Mac & Window), do the following:
- From the Cyberduck application menu, select the File New Browser... items (or press Command+N). Then select File Open Connection (or press Command + O). New connection window appears.
- From the drop-down menu at the top, select WebDAV (HTTP/SSL) or WebDAV (insecure, download only).
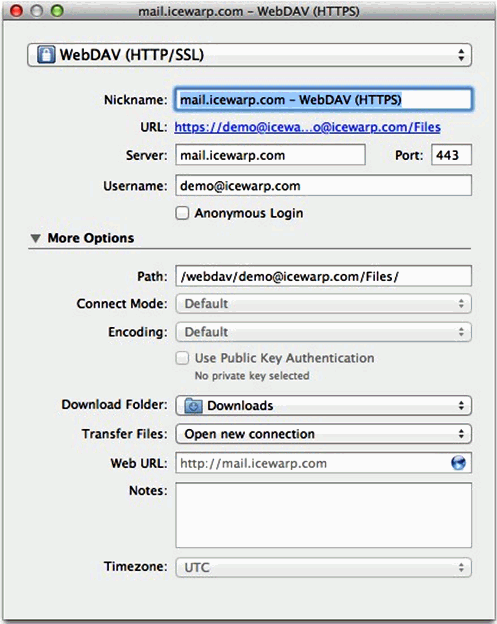
Figure. Adding WebDav.
- Into the Server field, type the server hostname (first part of URL).
- Into the Username field, type your email address.
- Into the Path field, type the path (second path of URL including your email address). You can also include the folder name, to directly open your Files folder, such as: /webdav/demo@icewarp.com/Files/
- In the Login with username and password dialog, fill in your email address into the Username field and password into the appropriate field. You can Check Add to Keychain if you wish to save these credentials. Click Login.
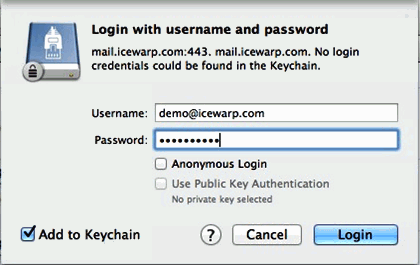
Figure. Login.
- A new file browser window with this network volume appears and the connection is added to your bookmarks, which you can access from the Cyberduck application menu File New browser (or Command + N) and double clicking the bookmark, or by choosing it from the Bookmark menu.
Working with WebFolders
It is possible to work with files that are placed in the Files folder. You can perform all usual operations (e.g. deleting. copying, moving, ...).
These files are also accessible via IceWarp WebClient.
As this feature is related only with files, entering of other folders is senseless you can find files there, but you can not work with them.
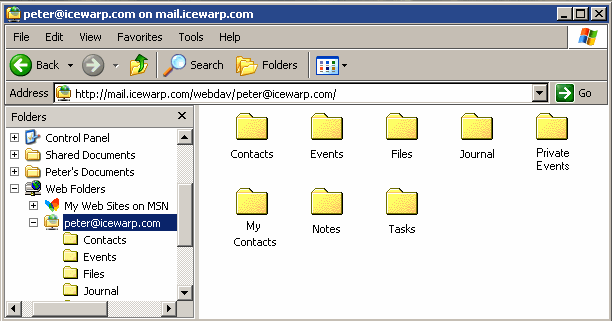
Figure. WebFolder.
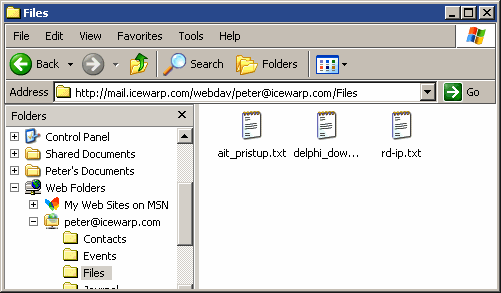
Figure. Files in WebFolder.

